⚠️ MQ-2 Gas Leakage Alarm
Detect combustible gases and smoke using the MQ-2 sensor and trigger an audible alarm.
Overview
The MQ-2 is a versatile sensor sensitive to LPG, propane, hydrogen, and smoke. It uses an internal heating element, so it needs a 'warm-up' period before readings become stable.
What you'll learn: Gas sensor calibration, analog thresholds, and safety system logic.
Estimated time: 35-45 minutes. Difficulty: ⭐⭐ Easy.
Components Needed
| Component | Specification | Qty | Notes |
|---|---|---|---|
| Arduino Uno R3 | 5V | 1 | |
| MQ-2 Gas Sensor | Analog output | 1 | |
| Piezo Buzzer | Active/Passive | 1 | |
| Red LED | Warning light | 1 | |
| Resistor | 220Ohm | 1 |
Component Pin Mapping
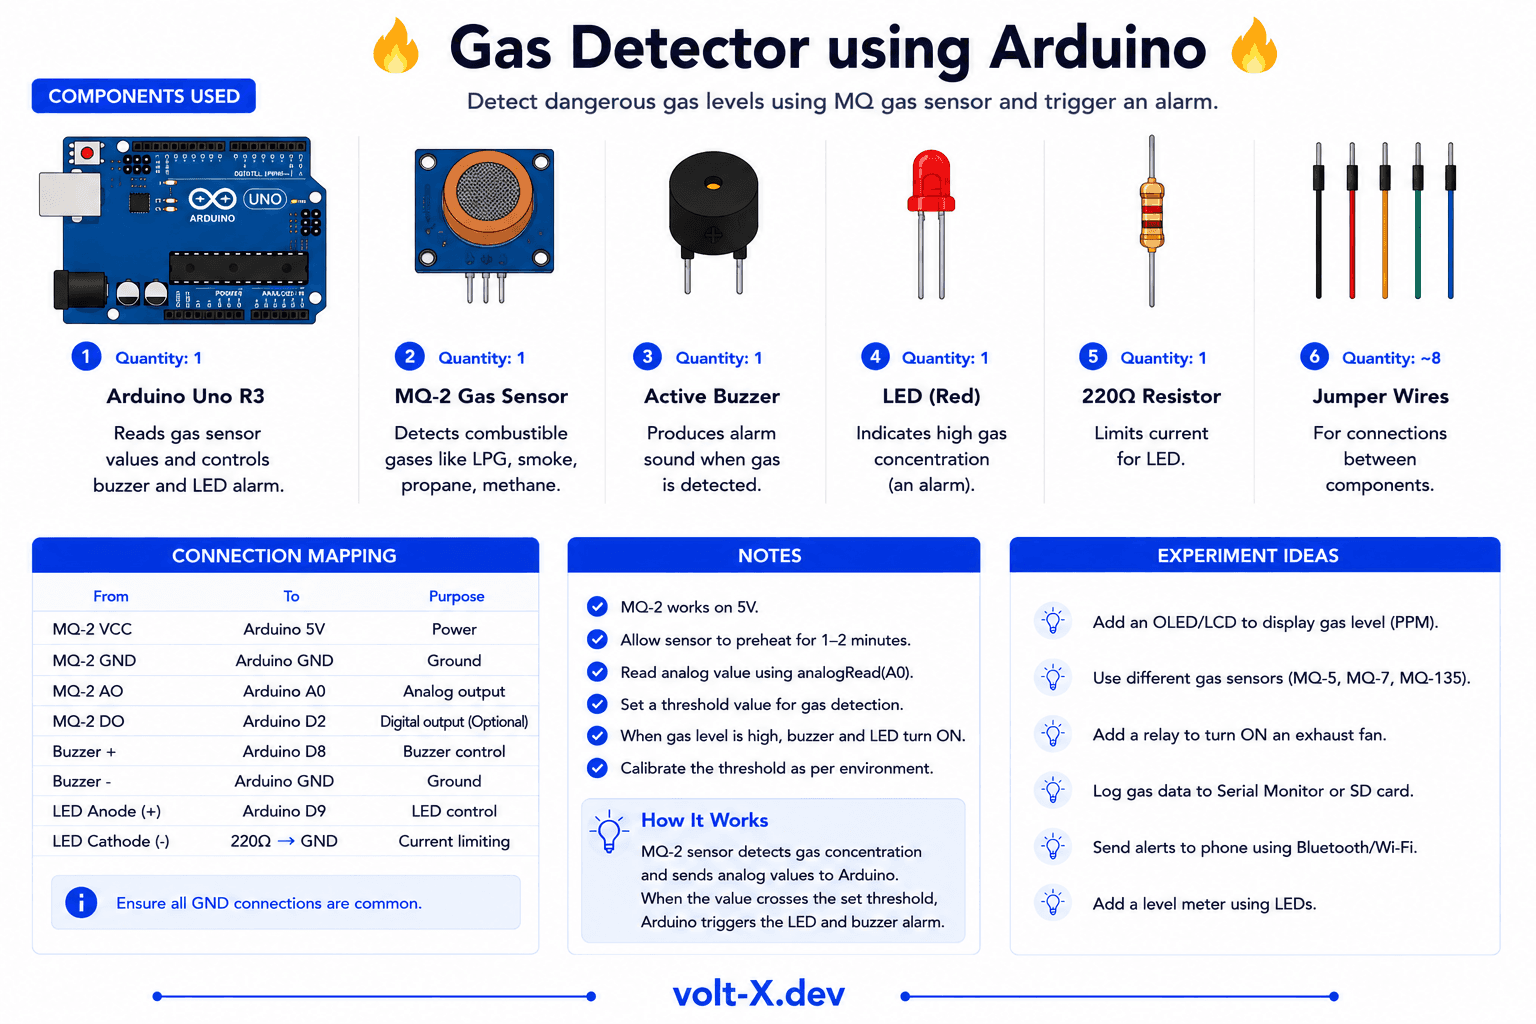
Step-by-Step Tutorial
1
Connect MQ-2
VCC → 5V, GND → GND, AO → Pin A0.
2
Connect Alert
Buzzer to pin 8, LED to pin 9.
3
Pre-heat Sensor
Let the sensor run for 2-3 minutes. It will get warm — this is normal.
4
Set Threshold
Check Serial Monitor for clean air values (~100-200). Use a lighter (don't ignite!) to test gas response.
The MQ-2 sensor has a small heater inside. If it's brand new, it might need to "burn-in" for 24 hours for maximum accuracy, but it works for basic projects in minutes.
Arduino Code
gas_detector.ino
INO
// Gas Leakage Alarm : Volt X
const int gasPin = A0;
const int buzzer = 8;
const int led = 9;
const int threshold = 400; // Adjust for your environment

void setup() {
  pinMode(buzzer, OUTPUT);
  pinMode(led, OUTPUT);
  Serial.begin(9600);
}

void loop() {
  int val = analogRead(gasPin);
  Serial.println(val);

  if (val > threshold) {
    digitalWrite(led, HIGH);
    tone(buzzer, 1000); // Continuous alarm
  } else {
    digitalWrite(led, LOW);
    noTone(buzzer);
  }
  delay(200);
}Reviews & Ratings
—0 reviews
Sign in to leave a review
Loading reviews...