🔐 4x4 Keypad Password Lock
Secure a virtual lock using a 4x4 membrane keypad and a secret 4-digit code.
Overview
Keypads use a matrix of rows and columns to save pins. A 4x4 keypad (16 buttons) only needs 8 pins. The Keypad library handles the complex scanning logic for you.
What you'll learn: Matrix scanning, including external libraries, and password verification logic.
Estimated time: 45-60 minutes. Difficulty: ⭐⭐⭐ Intermediate.
Components Needed
| Component | Specification | Qty | Notes |
|---|---|---|---|
| Arduino Uno R3 | 5V | 1 | |
| 4x4 Keypad | Membrane type | 1 | |
| LEDs (Red/Green) | Status indicator | 2 | |
| Resistors | 220Ohm | 2 |
Component Pin Mapping
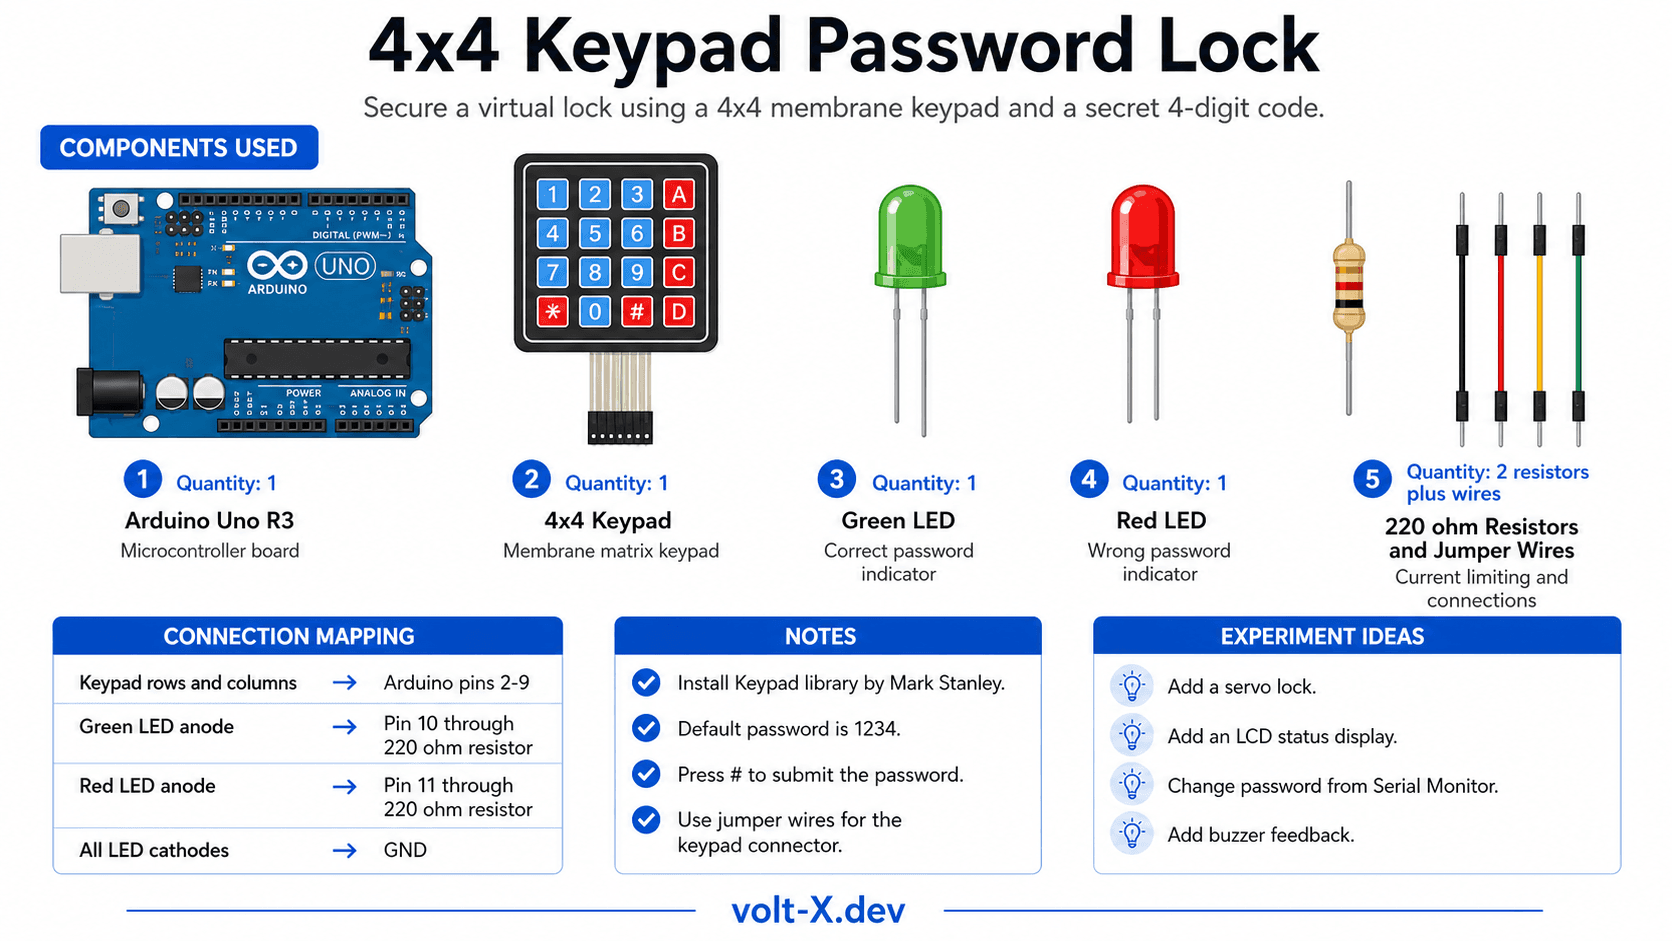
Step-by-Step Tutorial
1
Install Library
Open Library Manager and install
Keypad by Mark Stanley.2
Wire Keypad
Connect the 8 pins of the keypad to digital pins 2–9 in order.
3
Wire LEDs
Green to 10, Red to 11. These show if the code is correct or wrong.
4
Test Code
Upload the code. Default password is "1234". Press "#" to submit.
Membrane keypads can be tricky to plug into breadboards. Use male-to-male jumper wires to bridge the keypad connector to your breadboard pins.
Arduino Code
keypad_lock.ino
INO
// Keypad Lock : Volt X
#include <Keypad.h>

const byte ROWS = 4, COLS = 4;
char keys[ROWS][COLS] = {
  {'1','2','3','A'}, {'4','5','6','B'},
  {'7','8','9','C'}, {'*','0','#','D'}
};
byte rowPins[ROWS] = {9, 8, 7, 6};
byte colPins[COLS] = {5, 4, 3, 2};

Keypad keypad = Keypad(makeKeymap(keys), rowPins, colPins, ROWS, COLS);
String pass = "1234", input = "";

void setup() {
  pinMode(10, OUTPUT); // Green
  pinMode(11, OUTPUT); // Red
  Serial.begin(9600);
}

void loop() {
  char key = keypad.getKey();
  if (key) {
    if (key == '#') {
if (input == pass) {Reviews & Ratings
—0 reviews
Sign in to leave a review
Loading reviews...