📺 16x2 LCD Greeting Board
Display custom text and sensor data on a physical 16x2 LCD screen using the I2C protocol.
Overview
The 16x2 LCD is the classic display for Arduino projects. While the standard wiring takes 6+ pins, using an I2C adapter reduces it to just 2 wires (SDA and SCL).
What you'll learn: I2C communication, LiquidCrystal_I2C library, cursor positioning, and printing dynamic data.
Estimated time: 30-40 minutes. Difficulty: ⭐⭐ Easy.
Components Needed
| Component | Specification | Qty | Notes |
|---|---|---|---|
| Arduino Uno R3 | 5V | 1 | |
| 16x2 LCD with I2C | HD44780 + PCF8574 | 1 | Blue or Green backlight |
| Jumper Wires | Female-to-Male | 4 | For I2C connection |
| USB Cable | Type A to B | 1 |
Component Pin Mapping
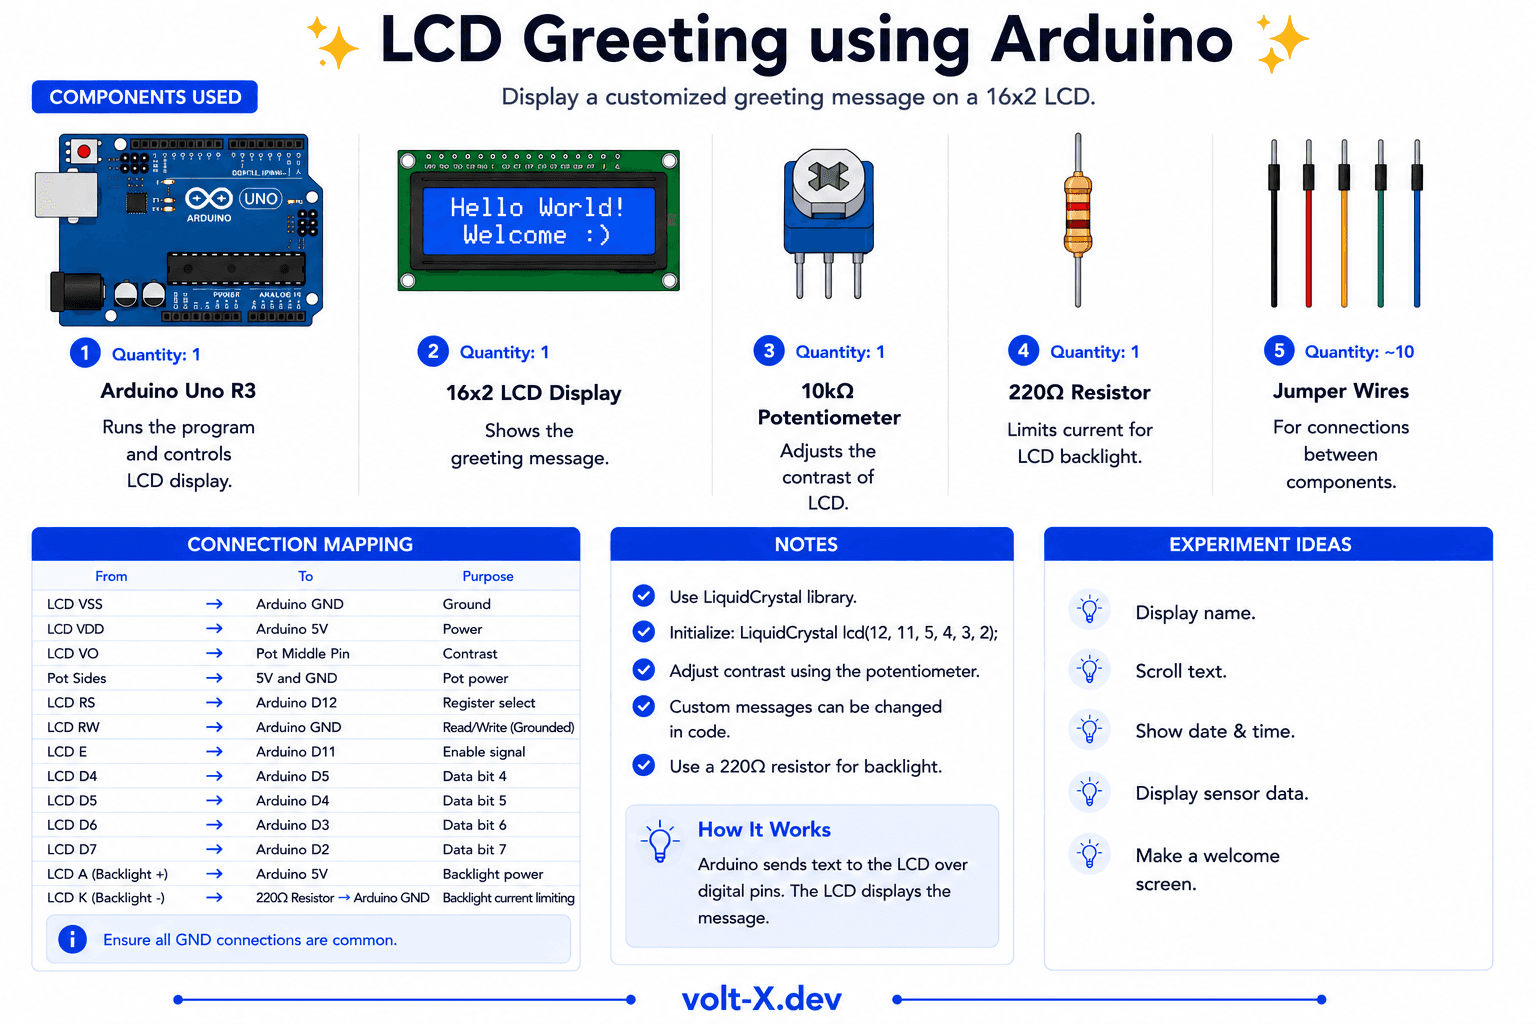
Step-by-Step Tutorial
1
Install I2C Library
Search for
LiquidCrystal I2C by Frank de Brabander in the Library Manager and install it.2
Connect I2C Pins
Connect VCC → 5V, GND → GND, SDA → Pin A4, SCL → Pin A5.
3
Find I2C Address
Most modules are
0x27 or 0x3F. Check your module's datasheet or use an I2C scanner sketch.4
Upload and Adjust
Upload the code. If you see blocks instead of text, adjust the blue potentiometer on the back of the LCD for contrast.
If the text is too faint or looks like solid blocks, use a small screwdriver to turn the blue potentiometer on the I2C backpack until the text is clear.
Arduino Code
lcd_greeting.ino
INO
// LCD Greeting : Volt X
#include <Wire.h>
#include <LiquidCrystal_I2C.h>

// Set address to 0x27 for 16 chars and 2 line display
LiquidCrystal_I2C lcd(0x27, 16, 2);

void setup() {
  lcd.init();
  lcd.backlight();

  lcd.setCursor(0, 0);
  lcd.print("Welcome to");
  lcd.setCursor(0, 1);
  lcd.print("Volt X Platform!");
}

void loop() {
  // Static display, no loop logic needed
}Reviews & Ratings
—0 reviews
Sign in to leave a review
Loading reviews...