💡 LED Chaser Animation
Build a Knight Rider-style LED sequence that sweeps back and forth. Your first step into the world of digital output and timing.
Overview
An LED chaser is one of the most satisfying beginner projects in electronics. You line up 8 LEDs and program them to light up one at a time in sequence, creating a smooth "running light" effect — just like the scanner on KITT from Knight Rider.
What you'll learn: Digital pin output (digitalWrite), for loops, timing with delay(), and how to wire multiple LEDs with current-limiting resistors.
Estimated time: 30–45 minutes. Difficulty: ⭐ Beginner-friendly — no prior experience required.
Components Needed
| Component | Specification | Qty | Notes |
|---|---|---|---|
| Arduino Uno R3 | ATmega328P, 5V | 1 | Any Uno-compatible board works |
| LEDs (5mm) | Red/Green, 2V, 20mA | 8 | Any color -> mix for fun |
| Resistors | 220 Ohm, 1/4W, +/-5% | 8 | One per LED for current limiting |
| Breadboard | 830 tie-points | 1 | Full-size recommended |
| Jumper Wires | Male-to-Male | ~12 | Various lengths |
| USB Cable | Type A to B | 1 | For uploading code |
Component Pin Mapping
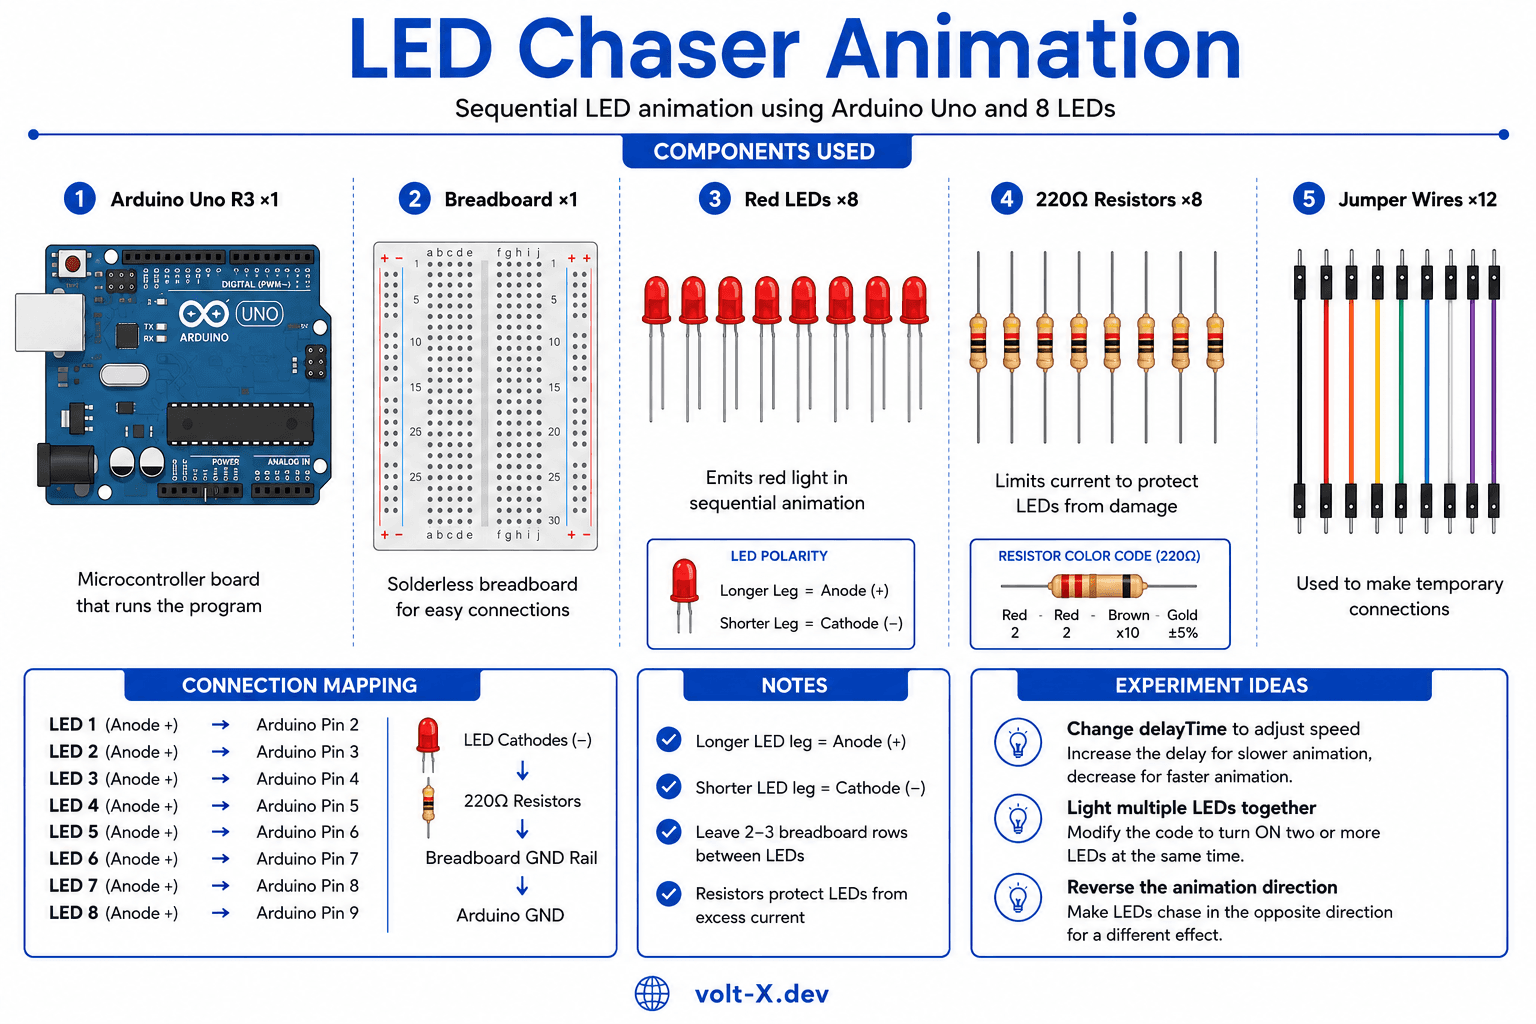
Step-by-Step Tutorial
1
Set Up the Breadboard
Place 8 LEDs in a row on the breadboard with the longer leg (anode, +) on the right and the shorter leg (cathode, -) on the left. Leave 2-3 rows between each LED for space.
2
Add Current-Limiting Resistors
Connect a
220 Ohm resistor from each LED's cathode (short leg) to the ground rail (blue/black stripe) on the breadboard. This protects each LED from burning out.3
Wire LEDs to Arduino
Use jumper wires to connect each LED's anode (long leg) to Arduino digital pins
2 through 9. LED 1 -> Pin 2, LED 2 -> Pin 3, and so on up to LED 8 -> Pin 9.4
Connect Ground
Run a jumper wire from the breadboard's ground rail to the
GND pin on the Arduino. This completes the circuit for all 8 LEDs.5
Upload the Code
Open the Arduino IDE, paste the code below, select your board and port under
Tools, then click Upload (-> arrow). Watch the LEDs chase back and forth!6
Experiment!
Try changing the
delayTime variable to speed up or slow down the animation. Try lighting 2 LEDs at once, or reverse the direction. Make it your own!Always use resistors with LEDs. Without them, the LED draws too much current and can burn out instantly. The 220Ω value works for most 5V setups with standard LEDs.
Arduino Code
led_chaser.ino
INO
// LED Chaser Animation — Volt X
// Pins 2-9 connected to 8 LEDs via 220Ω resistors

const int firstPin = 2;   // First LED pin
const int lastPin = 9;    // Last LED pin
int delayTime = 80;       // Speed in ms (lower = faster)

void setup() {
  for (int pin = firstPin; pin <= lastPin; pin++) {
    pinMode(pin, OUTPUT);
  }
}

void loop() {
  // Sweep forward: left to right
  for (int pin = firstPin; pin <= lastPin; pin++) {
    digitalWrite(pin, HIGH);
    delay(delayTime);
    digitalWrite(pin, LOW);
  }
  // Sweep backward: right to left
  for (int pin = lastPin; pin >= firstPin; pin--) {
    digitalWrite(pin, HIGH);
    delay(delayTime);
digitalWrite(pin, LOW);Reviews & Ratings
—0 reviews
Sign in to leave a review
Loading reviews...